
Slate roofs are beautiful, natural and long-lasting, but like any construction job, they need to be installed correctly and by someone with experience and knowledge, to ensure a job well done that will last for many years.
Get the right slates
Picking the correct roofing slates is key to any good roofing job. There are masses of differences in slates available, according to size, price, colour, thickness, type and manufacturing quality, so always do your homework first. Thick slates will be harder to cut, and will require more expertise to install. Small slates take longer to install because you need more of them. Some slates contain pyrites, which will run red stains down the roof. So, really do get to know your roofing slates before starting on any job.
Do your homework
Installing roof slates isn’t something that you can pick up as you go along; you really need to know what you’re doing beforehand. So, this is going to require some studying. Whether you scour books, manuals or the internet, ‘how to’ video clips or speak to experts, get savvy on slating as much as you can. As well as how to install slate tiles, get to grips with common problems that can occur, so you can try to avoid them as you go along.
Felt first
Install roofing felt first, to ensure water is kept out, until the roofing slates are in place. It makes a good surface on which to chalk lines. The roofing felt is only temporary and should not be relied on as a permanent measure to keep water out, nor should it be installed on top of the slates.
Get the right tools
It might sound obvious, but if you want to do a decent job, you’ll need the correct tools to help you. You’ll need a slate cutter, slate ripper and a slate hammer. Roof brackets, scaffolding, ladder hooks and other equipment will also be required.
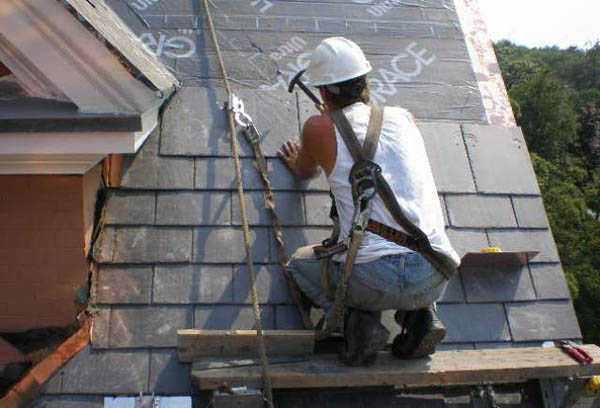
Don’t walk on the slates
Walking on the roofing slates as you’re installing them, is one of the biggest no-nos of this job. It can cause the slates to break and fall after the roof has been installed. Use a roof jack and planks instead. Stage the roof properly to avoid shedding slates.
Mark your lines
To ensure accuracy and consistency, install every course of slates along a chalk line, measured from the bottom of the roof. Get your headlaps and sidelaps right, and don’t chalk on the slates themselves.
Slate perfect
If you’re installing a new slate roof needing several pallets of slate, blend the slates by taking some from all the pallets at once, before sending them up onto the roof. Lay your starter slates back side up, to allow the edge bevel to merge flush with the edge bevel of the first course.
Nail it
Try to avoid using too much pressure when nailing the slates, as it can damage them. At the same time, don’t under-nail them. Thicker slates, however, can get away with drilled holes and are less likely to be damaged. Use copper or stainless steel roofing nails for the slates, and electro-galvanised nails for the roofing felt.
Flashing material
As with other materials and equipment used for this job, make sure you use good quality flashing material. Copper flashings or stainless steel are the best. Sheet lead is also a good flashing material.